Want to create amazing videos with cool backgrounds but don’t know how? Green screen editing is your answer, and with CapCut, it’s super easy!
If you’re new to video editing, removing a background might seem tricky, but don’t worry—I’ve got you covered.
In this guide, I, Aarij Sargani, will show you two easy methods to use green screen in CapCut: the Chroma Key effect and the Auto Background Remover.
By the end, you’ll know how to make your videos pop with eye-catching effects, perfect for social media or personal projects!
What is a Green Screen?
A green screen is a way to change the background in a video. You film your subject in front of a green backdrop, and later, you can replace the green background with any picture or video you want.
Green is used because it’s a color that’s easy to remove during editing and doesn’t usually match clothing or skin tones.
This method is common in movies, TV shows, and social media, helping create cool effects like placing someone in a different location.
With CapCut, you can use a green screen to make your videos more fun by swapping the background for anything you imagine!
Just like how the green screen changes your video background, CapCut’s Background Audio Noise Remover helps to get rid of unwanted sounds, making your audio clear and sharp.
What You Need Before Starting
Before using the green screen effect in CapCut, you’ll need a green screen (a green cloth or backdrop), good lighting, and the CapCut app on your phone or tablet.
You’ll also need two videos: your main video and the green screen video with a subject in front of the green background.
Set up your green screen in a well-lit area, making sure it fully covers the background.
Avoid shadows by leaving some space between the subject and the screen. Now, you’re ready to start editing in CapCut!
Step-by-Step Guide to Adding Green Screen in CapCut
Step 1: Import Your Footage into CapCut

- Open the CapCut app and tap “New Project.”
- Select your main video from your gallery.
- Then, import your green screen video, which you want to overlay on the main video.
Step 2: Add Green Screen Overlay
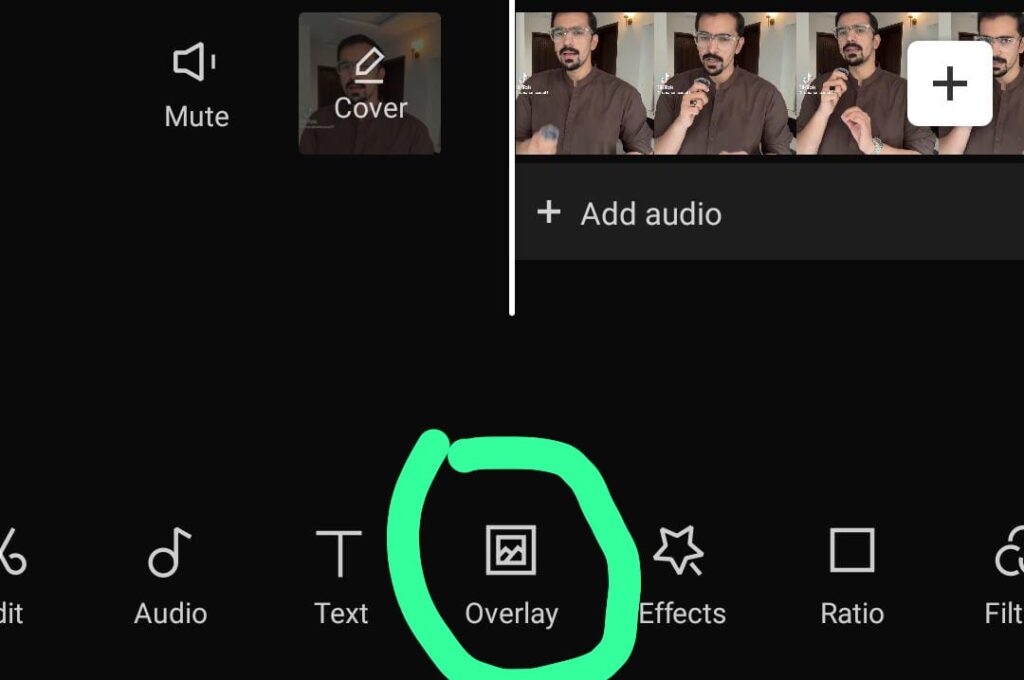
After adding your main video, find the Overlay option at the bottom of the screen.
Tap “Overlay“.

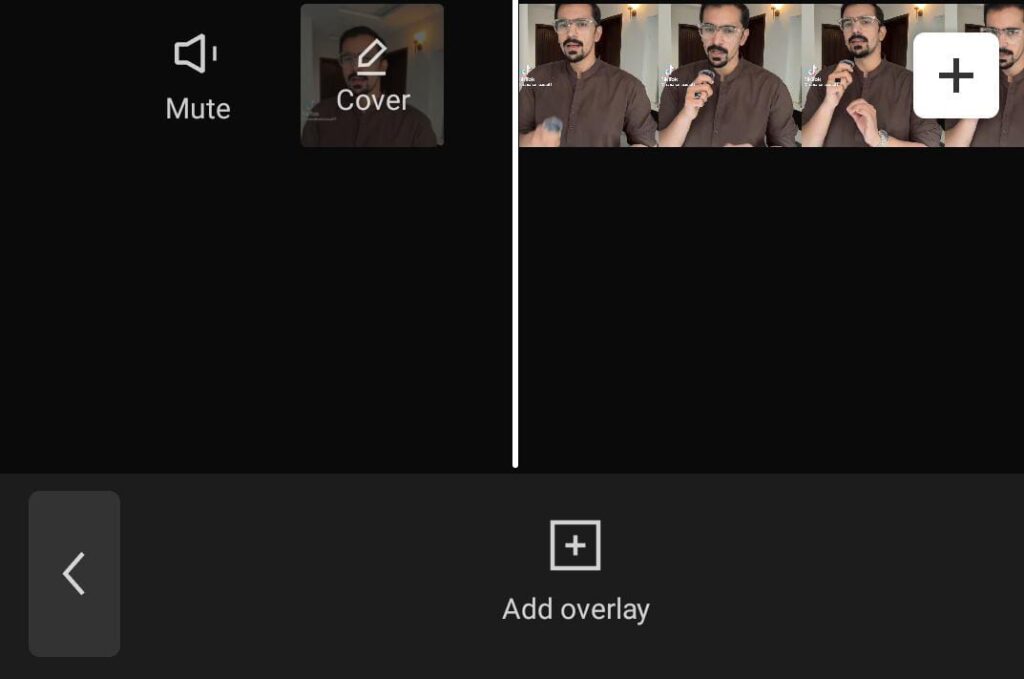
Then “Add Overlay.”

Choose the green screen video and it will be placed on top of your main video.
Step 3: Remove the Green Background
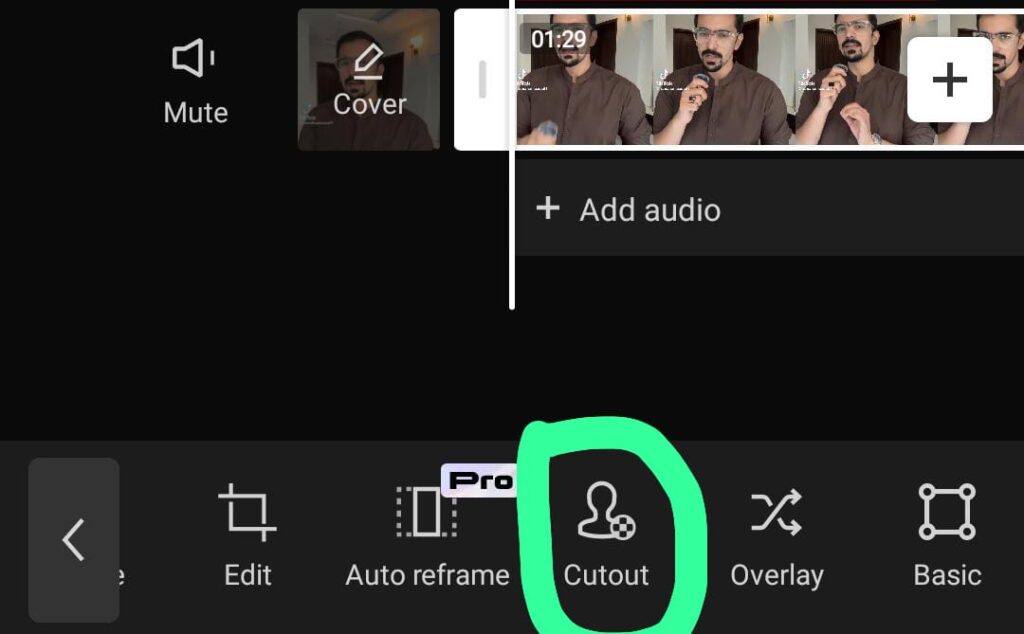
Tap on the green screen video to select it.
Scroll through the editing tools and go to “cutout“.

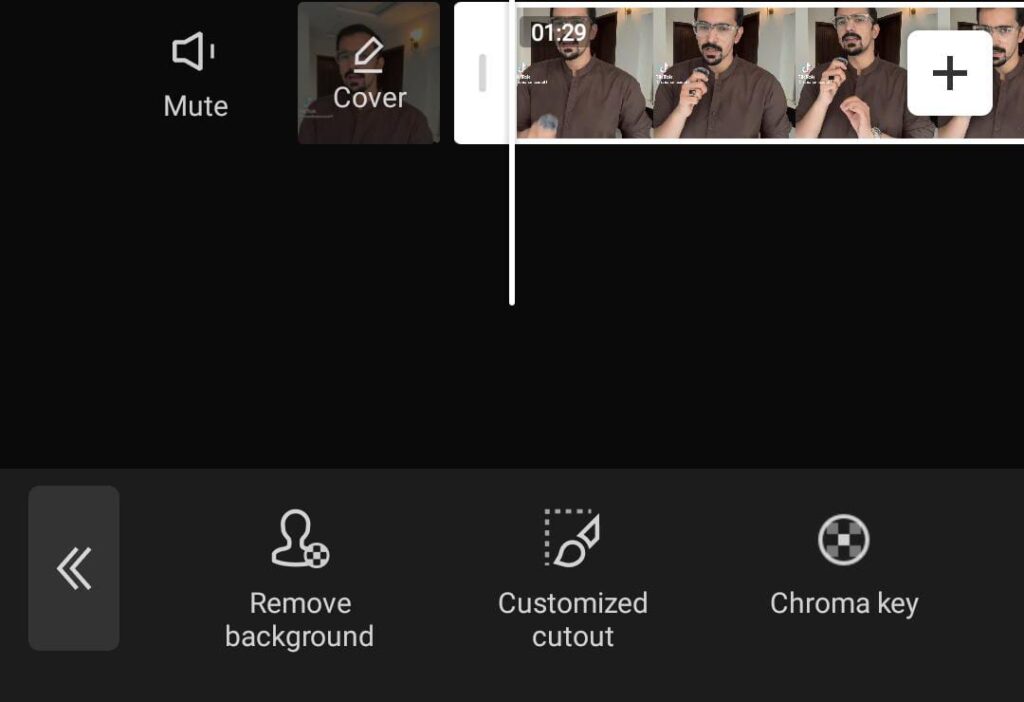
And select “Chroma Key“, “Customized Cutout” or “Remove Background“.

- “Chroma Key” lets you replace a solid background with any image or video. It needs some adjustments for the best results.
- I recommend “Remove Background” which automatically erases the background and removes the BG Quickly.
- You can also try “Customized Cutout” to manually remove it with a brush for more control.
If you have chosen the “Chroma Key” now you have to do these steps:
- You will see a “color picker“. Tap it to choose the green background.
- Once selected, you can adjust the Intensity and Shadow settings to make the green disappear more cleanly.
Step 4: Make Final Adjustments
- Sometimes, small green spots might remain. You can remove them by cropping the edges of the green screen video.
- If the brightness or color of the green screen video doesn’t match your main video, you can adjust things like brightness, contrast, and saturation until everything looks good.
Step 5: Add a Background Video or Image
- You can add a video or image to replace the green screen with a new background.
- Tap the “Add” option to include your background video or image.
- Make sure to resize and position the background so it fits well with your scene.
Step 6: Add Finishing Touches
- You can make your video more fun by adding text, animations, or filters.
- If you want, you can also add music or sound effects to make your video more exciting.
Step 7: Exporting and Sharing Your Green Screen Video

Once your video is done, you can save it. Tap the Export button and choose the best quality settings to keep your video looking sharp.
Most social media platforms like YouTube, TikTok, or Instagram work best with 1080p video quality. Once the video is saved, you can easily share it with others.
Conclusion
Using the green screen effect in CapCut is a simple way to make your videos look cool and professional.
By following these easy steps, you can remove the green background and add any video or image you want.
Play around with different backgrounds and settings to make your videos stand out!


One thought on “How To Use Green Screen In CapCut: Step-by-Step Instructions”