
How To Add Glitch Effect in Capcut Like a Pro
Full Guide on How To Add Glitch Effect in Capcut Like a Pro, Adding a glitch effect to your videos in CapCut is a fun and easy way to give your content a unique, eye catching style. Here’s a step by step guide to help you How to add glitch effect in CapCut like a pro, along with an FAQ section to answer some common questions. how to add a glitch effect in CapCut, this guide is here to help!
I will guide you through each step, so even if you’re new to video editing, you can easily create cool glitch effects.
What is a Glitch Effect?
A glitch effect makes your video appear as if it has a digital error or is not working properly. You might have seen it in music videos, movie intros, or even on social media.
The glitch effect can make your videos stand out by giving them a unique, edgy feel.
A glitch effect looks like an old TV with poor reception, causing a flickering and distorted image. It’s perfect for adding excitement or a futuristic vibe to your videos.
Why Use CapCut for Glitch Effects?
CapCut is a great app for adding glitch effects to your videos because it’s super easy to use, and best of all, it’s free!
Whether you’re making a video for TikTok, YouTube, or just for fun, CapCut has all the tools you need to create professional-looking glitch effects without any complicated steps.
One of the reasons I love using CapCut is that it offers a variety of glitch styles. You can easily find and apply the perfect glitch effect to match the mood of your video.
Plus, the app allows you to adjust the intensity and duration of the effect, so you can customize it just the way you like.
Step by Step Guide: How to Add Glitch Effect in CapCut
You now know what a glitch effect is and why CapCut is good for it. Let’s look at how to add this effect to your videos.
Step 1: Open Your Project in Capcut
To add a glitch effect, you’ll need to have a video to work with. Open CapCut and either start a new project or choose an existing video from your gallery.
If you’re starting fresh, tap on the “New Project” button and select the video clip you want to edit.

Step 2: Navigate to Effects

Once your video is loaded, it’s time to add the glitch effect. Look for the “Effects” tab at the bottom of the screen. This is where you’ll find different effects CapCut has to offer.
Step 3: Choose the “Video Effects”

In the Effects tab, click on the “Video Effects” section. Then in the Effects tab, scroll through the options until you find the “Glitch” section.
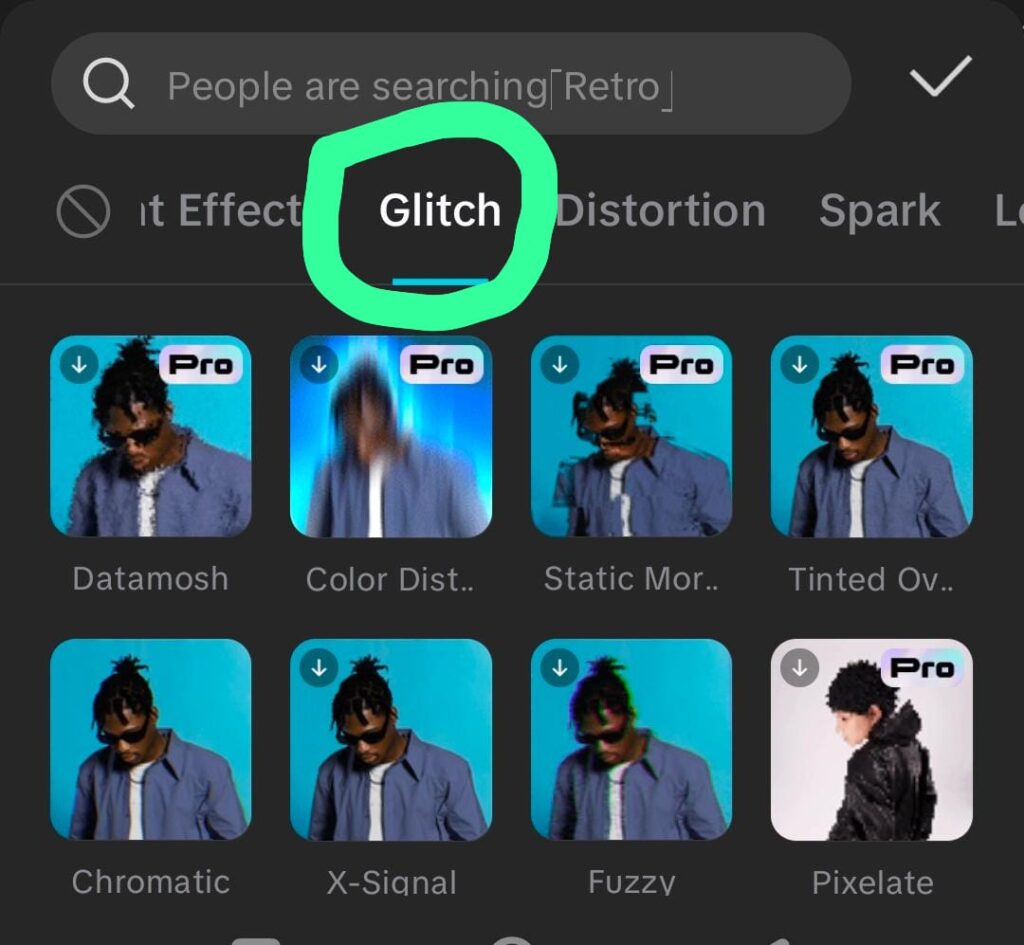
CapCut offers several glitch styles, like “RGB Split,” “VHS,” and “Digital Glitch.” Tap on the glitch effect that best fits the style you’re going for.
Step 4: Apply and Adjust the Glitch Effect
After selecting your glitch effect, drag it onto the timeline where you want it to appear in your video.
You can adjust the length of the effect by dragging the edges of the clip in the timeline. To make your glitch effect even cooler, tap on the effect to bring up the adjustment options.
Here, you can tweak the intensity, color, and duration of the effect to get it just right.
Make sure your video is stable before adding the glitch effect. This way, the effect looks smooth and not shaky.
Step 5: Preview and Export Your Video
After applying the glitch effect, preview your video to ensure it looks how you want it to. Simply press the play button to see how it all comes together.

If you like the result, tap the “Export” button in the top right corner to save your video. Now, your video is ready to share with the world!
Additional Tips for Perfecting Your Glitch Effect
To make your glitch effect even more impressive, consider adding some complementary effects or transitions.
You can mix the glitch effect with a “Shake” effect for a stronger visual experience. You can combine various glitch effects in your video to create more depth and make it more interesting.
Timing is also crucial when using glitch effects. Try applying the effect at key moments in your video, like during a beat drop in a song or when transitioning between scenes.
This will make the effect more impactful and engaging for your viewers.
Combine glitch effects with auto subtitles to make your video even more engaging and easier to understand.
Common Mistakes to Avoid
While glitch effects are fun to use, it’s easy to overdo them. Beginners often overuse the glitch effect, making their videos look messy and hard to watch.
Use the glitch effect carefully and only when it improves the overall mood of your video.
Another mistake is not adjusting the timing of the effect properly. If the glitch effect is too short or too long, it might not have the desired impact. Be sure to preview your video and make adjustments as needed to get the timing just right.
Tips for a Professional Glitch Effect
- Sync with Music: Sync the glitch effects with the beats or intense moments in your soundtrack for an even cooler effect.
- Layer Different Glitches: Combine various glitch effects, such as RGB shifts, static, or distortion, to create a unique look.
- Timing Is Key: Use glitches at specific points in your video to highlight important moments, rather than throughout the whole video.
By following these steps and tips, you’ll be able to create a polished and professional-looking glitch effect for your videos in CapCut.
FAQ: Common Questions About Adding Glitch Effects in CapCut
Q1: Can I add multiple glitch effects to the same video?
Q2: Can I adjust the intensity of the glitch effect?
Q3: How do I make the glitch effect look smoother?
Can I use glitch effects on photos, or is it just for videos?
Conclusion
Adding a glitch effect in CapCut is a simple way to give your videos a unique and edgy look. By following the steps outlined in this guide, you can easily apply and customize glitch effects to fit your style.
Remember to experiment with different glitch styles, layers, and timings to create something truly eye catching.
With practice, you’ll be able to create professional looking glitch effects that make your videos stand out.
So go ahead, give it a try, and don’t be afraid to get creative with your edits!
6 thoughts on “How To Add Glitch Effect in Capcut Like a Pro”